



You can use Gmail to receive and send messages from your MarpaMail account without opening MarpaMail Webmail separately. Gmail connects to your MarpaMail mailbox using POP3 for incoming messages and SMTP for outgoing messages.
Before starting, review the MarpaMail Email Server Settings article. You will need your MarpaMail email address, password, server hostname, and mail ports during the setup.
Open Gmail Settings
Sign in to your Gmail account and open Settings from the gear icon in the top-right corner.
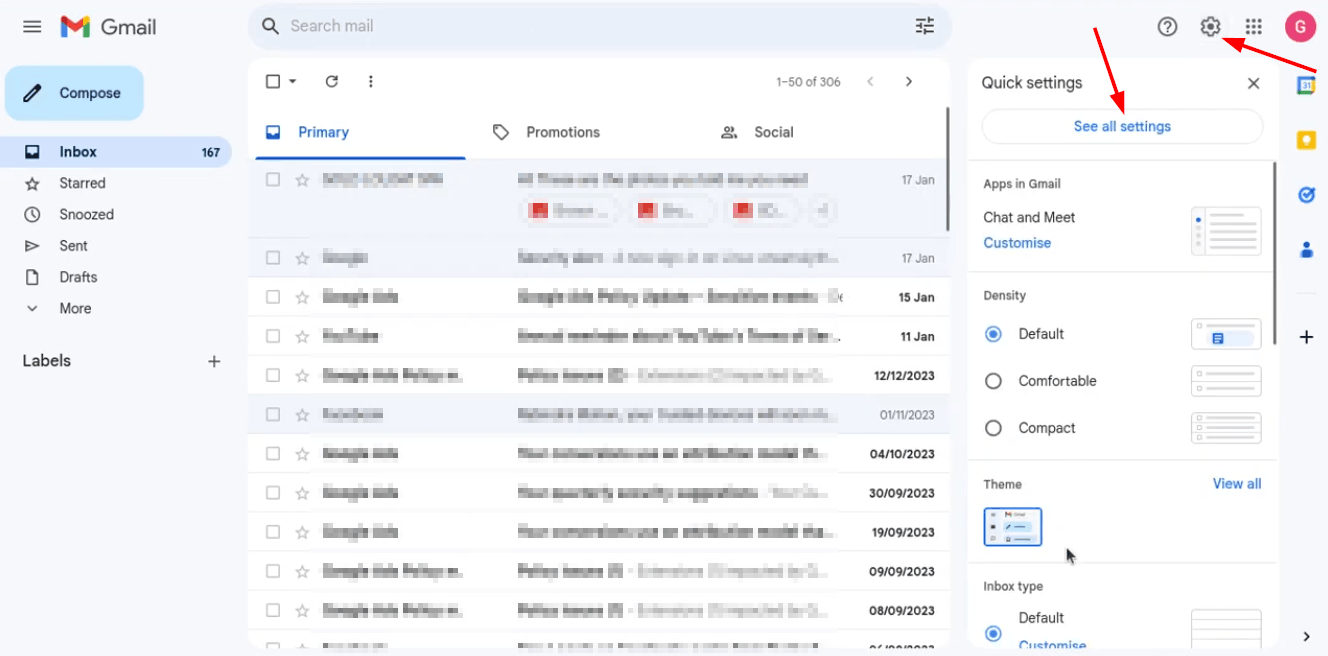
Select See all settings to open the complete Gmail settings page.
Open Accounts and Import
In Gmail Settings, open the Accounts and Import tab. Find the Check email from other accounts section and select Add an email account.
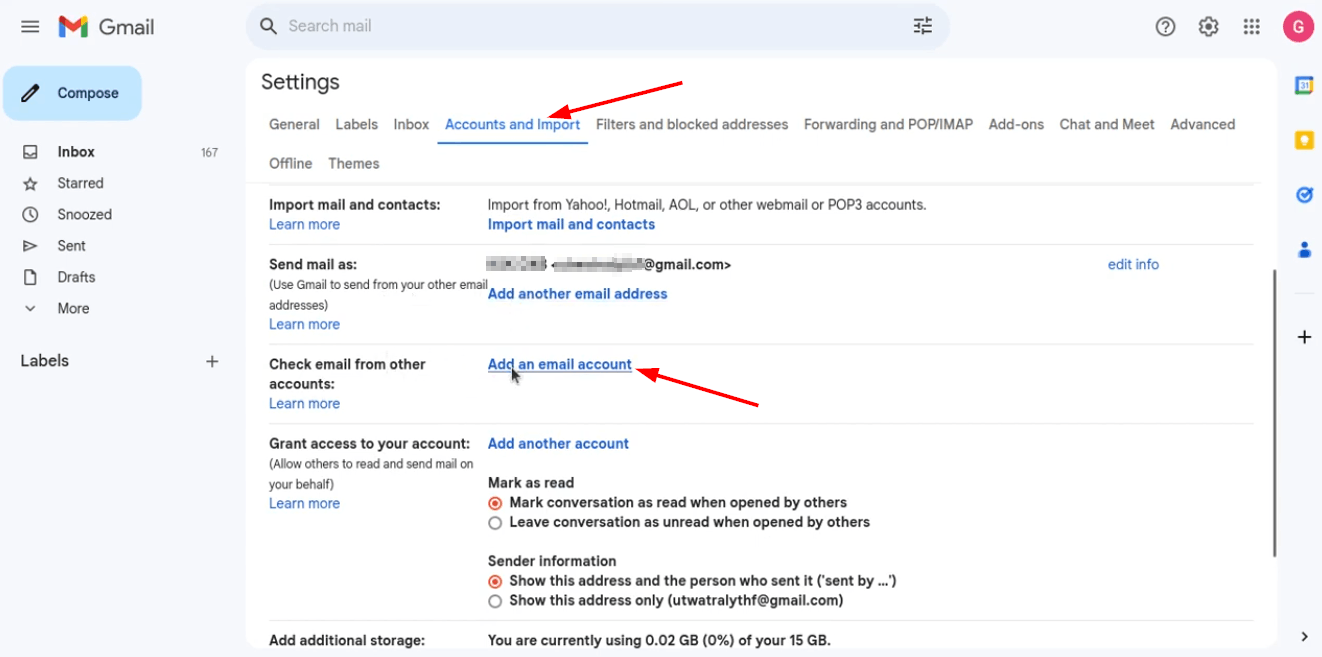
Enter the full MarpaMail email address you want to connect and select Next.

Choose POP3
Gmail will ask how you want to access the account. Select Import emails from my other account (POP3) and continue.

Enter MarpaMail POP3 Settings
Enter your MarpaMail account details using the following settings:
Username: Your full MarpaMail email address
Password: Your MarpaMail email password
POP Server: mail.marpamail.com
Port: 995
Secure connection: Enable Always use a secure connection (SSL)
You can also choose whether Gmail should leave a copy of downloaded messages on the MarpaMail server.

Select Add Account to continue.
Enable Sending From Your MarpaMail Address
After Gmail successfully adds the account, Gmail will ask whether you also want to send messages using your MarpaMail address.
Select Yes, I want to be able to send mail as... and continue.

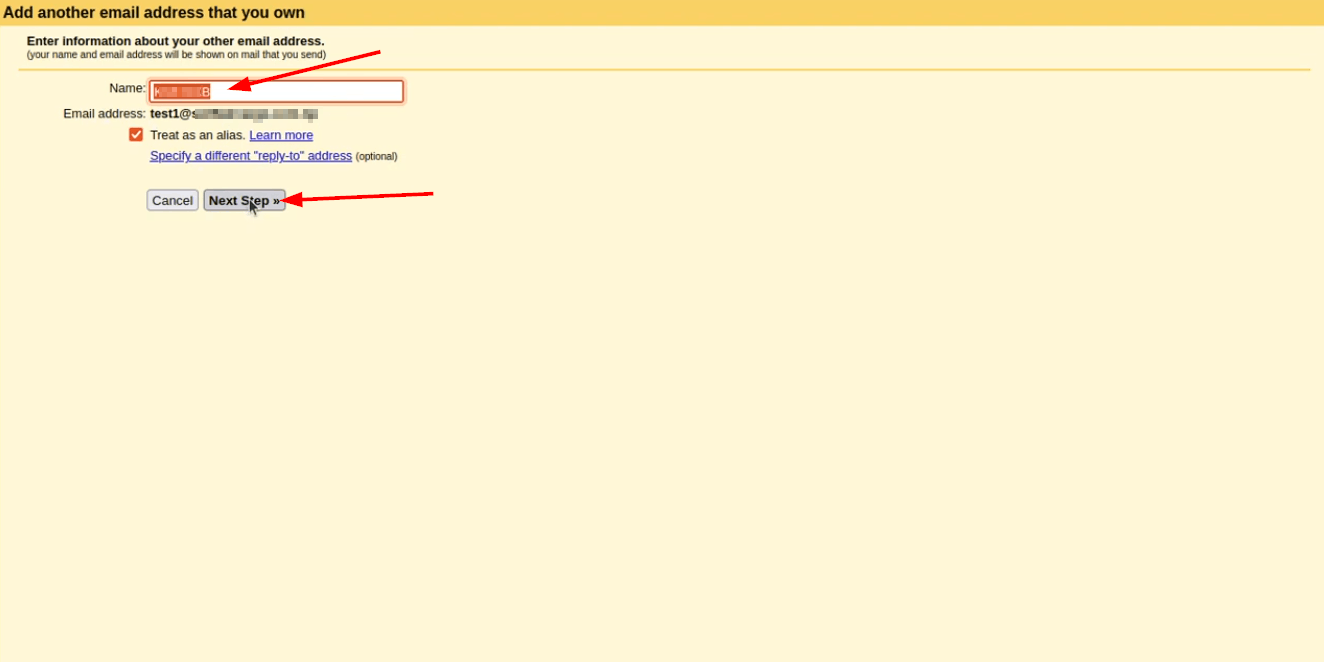
Enter the name that should appear when sending messages and confirm your MarpaMail email address. Select Next Step.
Configure MarpaMail SMTP
Enter the MarpaMail SMTP settings:
SMTP Server: mail.marpamail.com
Port: 587
Username: Your full MarpaMail email address
Password: Your MarpaMail email password
Secure connection: TLS
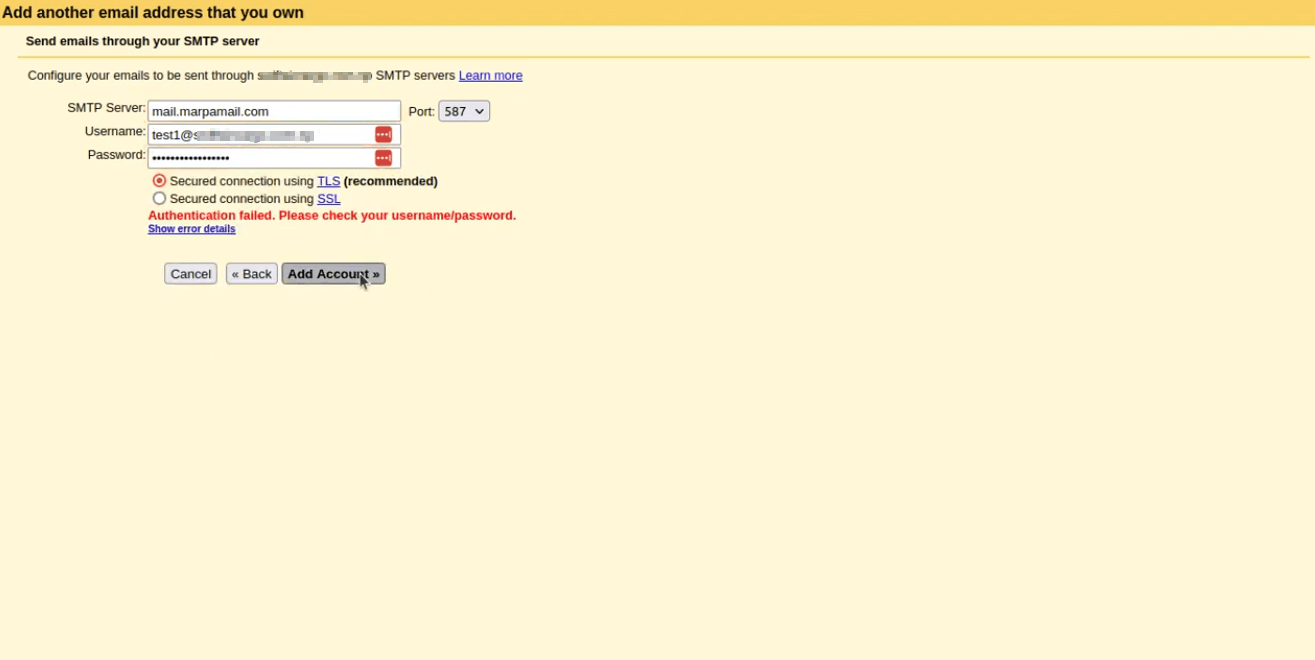
Select Add Account. Gmail will verify the MarpaMail SMTP credentials.
Verify Your MarpaMail Address
After you add the MarpaMail SMTP settings, Gmail sends a confirmation email to the MarpaMail address. Open the message and follow the confirmation link to verify the address for sending mail through Gmail.
Gmail also sends a confirmation message to the Gmail address being used for the setup. Open that confirmation message and complete the confirmation to authorize the connection.
Both confirmation steps must be completed before the MarpaMail address is fully enabled for sending through Gmail.
Once the verification is completed, your MarpaMail account can be accessed through Gmail for receiving and sending email.
Check the Account in Gmail
After both confirmations are complete, return to Gmail → Settings → Accounts and Import. The MarpaMail address should now appear under Send mail as.
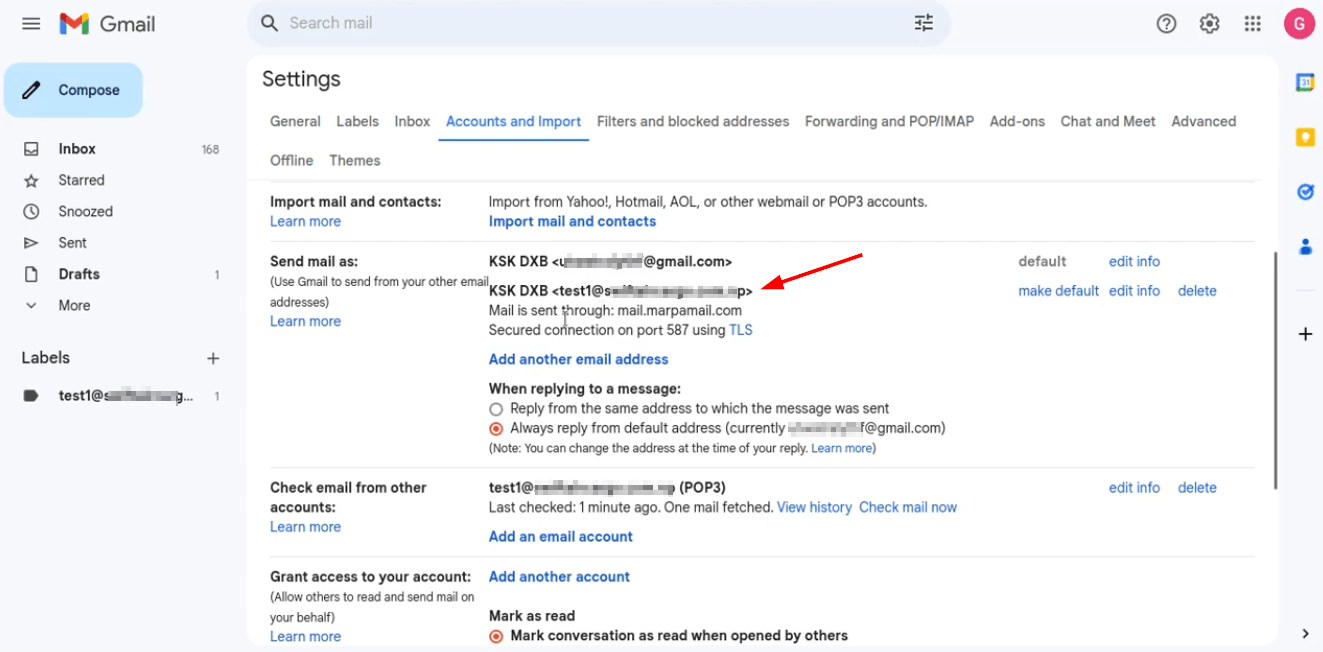
This confirms that your MarpaMail account has been successfully connected to Gmail.