



Email forwarding allows you to automatically send incoming messages from your MarpaMail account to another email address. This is useful when you want to receive your MarpaMail messages in a personal or secondary mailbox without manually forwarding each message.
Before setting up forwarding, make sure you can sign in to your MarpaMail account and have the destination email address ready.
Sign in to Your Mail Account
Sign in to the MarpaMail portal using your email address and password.
Open Sieve Filters
After signing in, open the Mail section from the left-side navigation menu. Select Sieve filters.
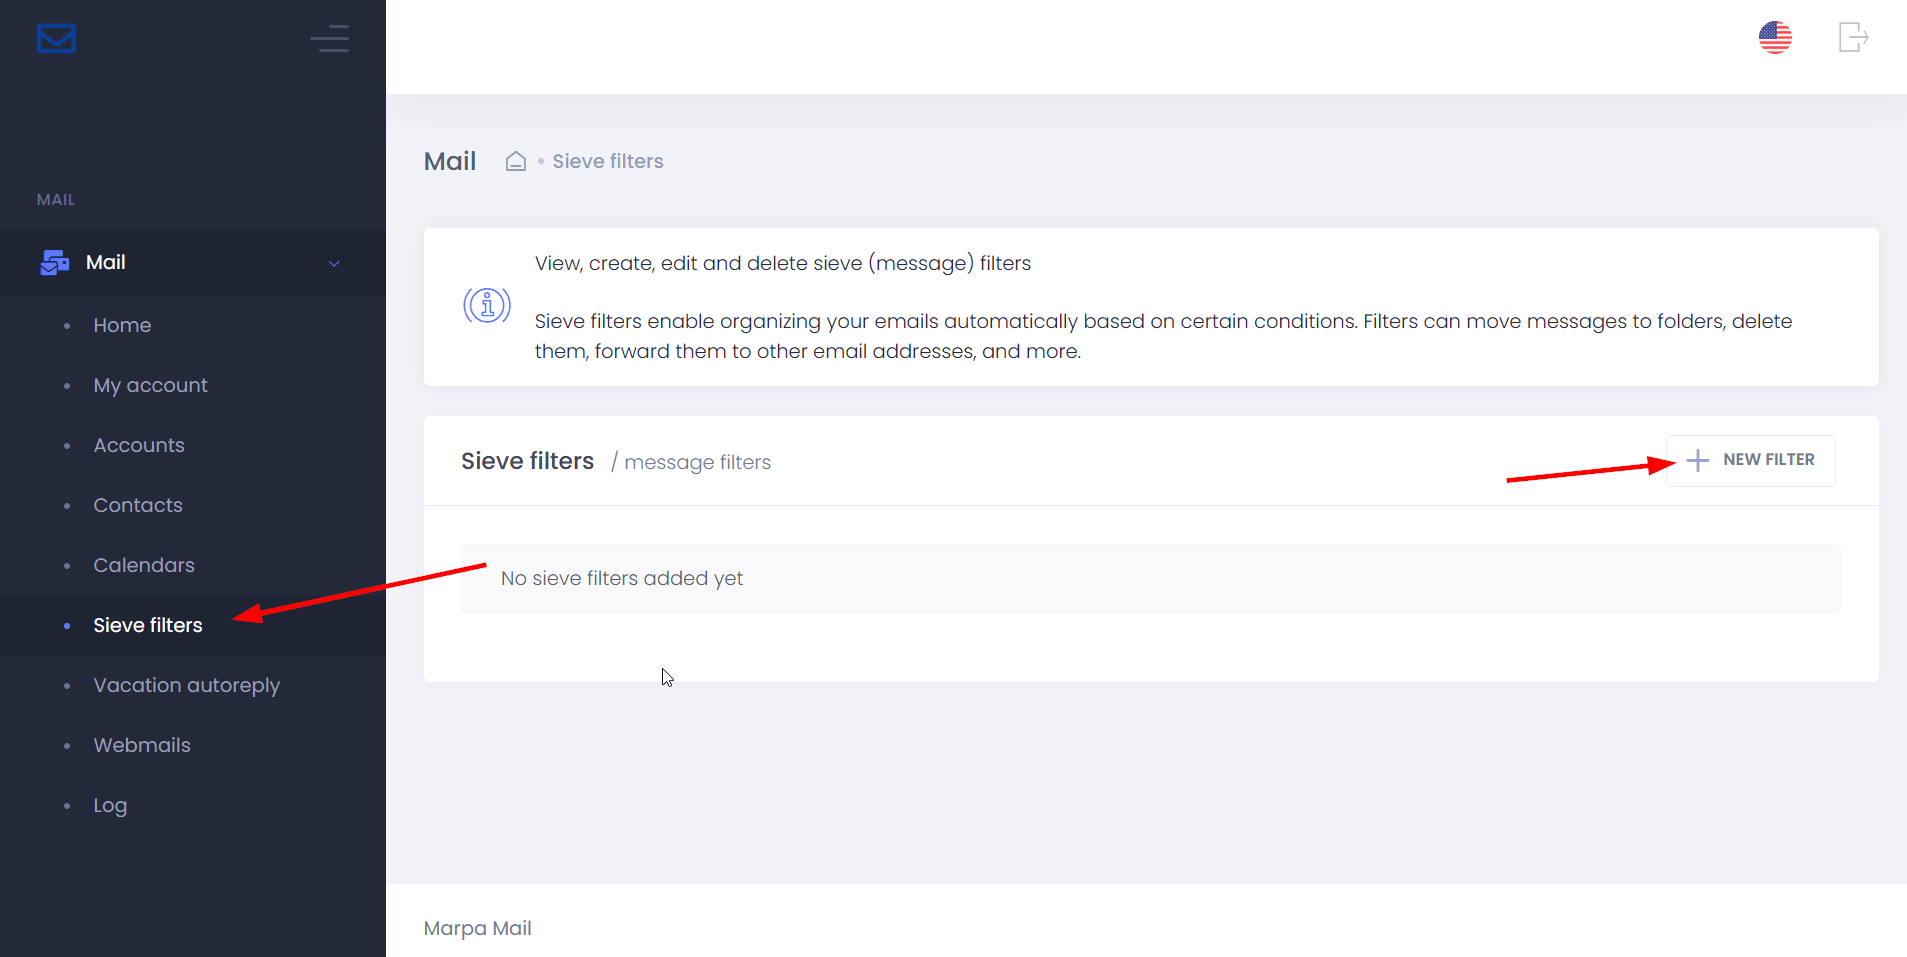
On the Sieve filters page, select NEW FILTER to open the filter creation window.
Enter the Filter Position & Friendly Filter Name
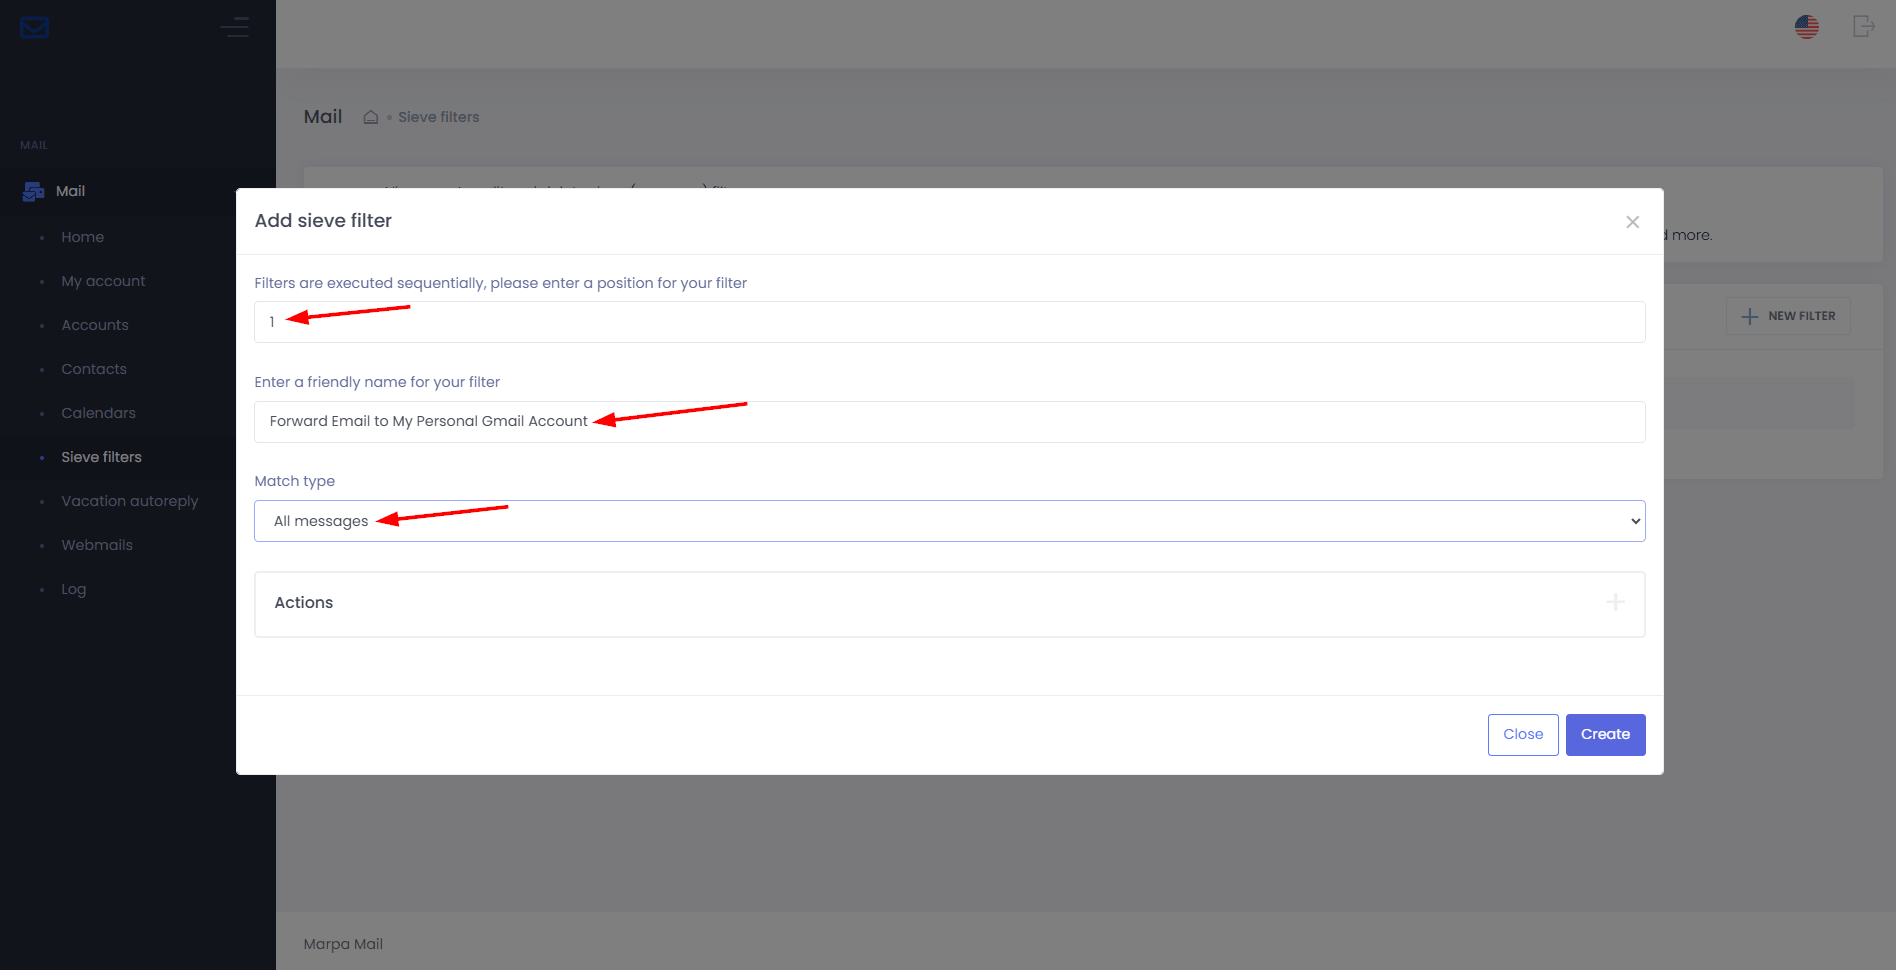
In the Filter position field, enter the position where the filter should be executed.
For a new forwarding filter, enter 1 if this is the first filter you are creating.
Enter a descriptive name in the friendly name field so you can easily identify the purpose of the filter later.
For example, you can name it Forward Email to My Personal Gmail Account.
Under Match type, select All messages if you want every incoming message to be forwarded.
Using All messages means the forwarding action will apply to every email received by the account, rather than only messages that meet a specific condition.
Add an Action
Open the Actions section by selecting the + icon.
The Actions section determines what MarpaMail should do when a message matches the filter. Since the purpose of this filter is to forward incoming messages, an appropriate forwarding action must be selected here.

Select Keep and Forward Message
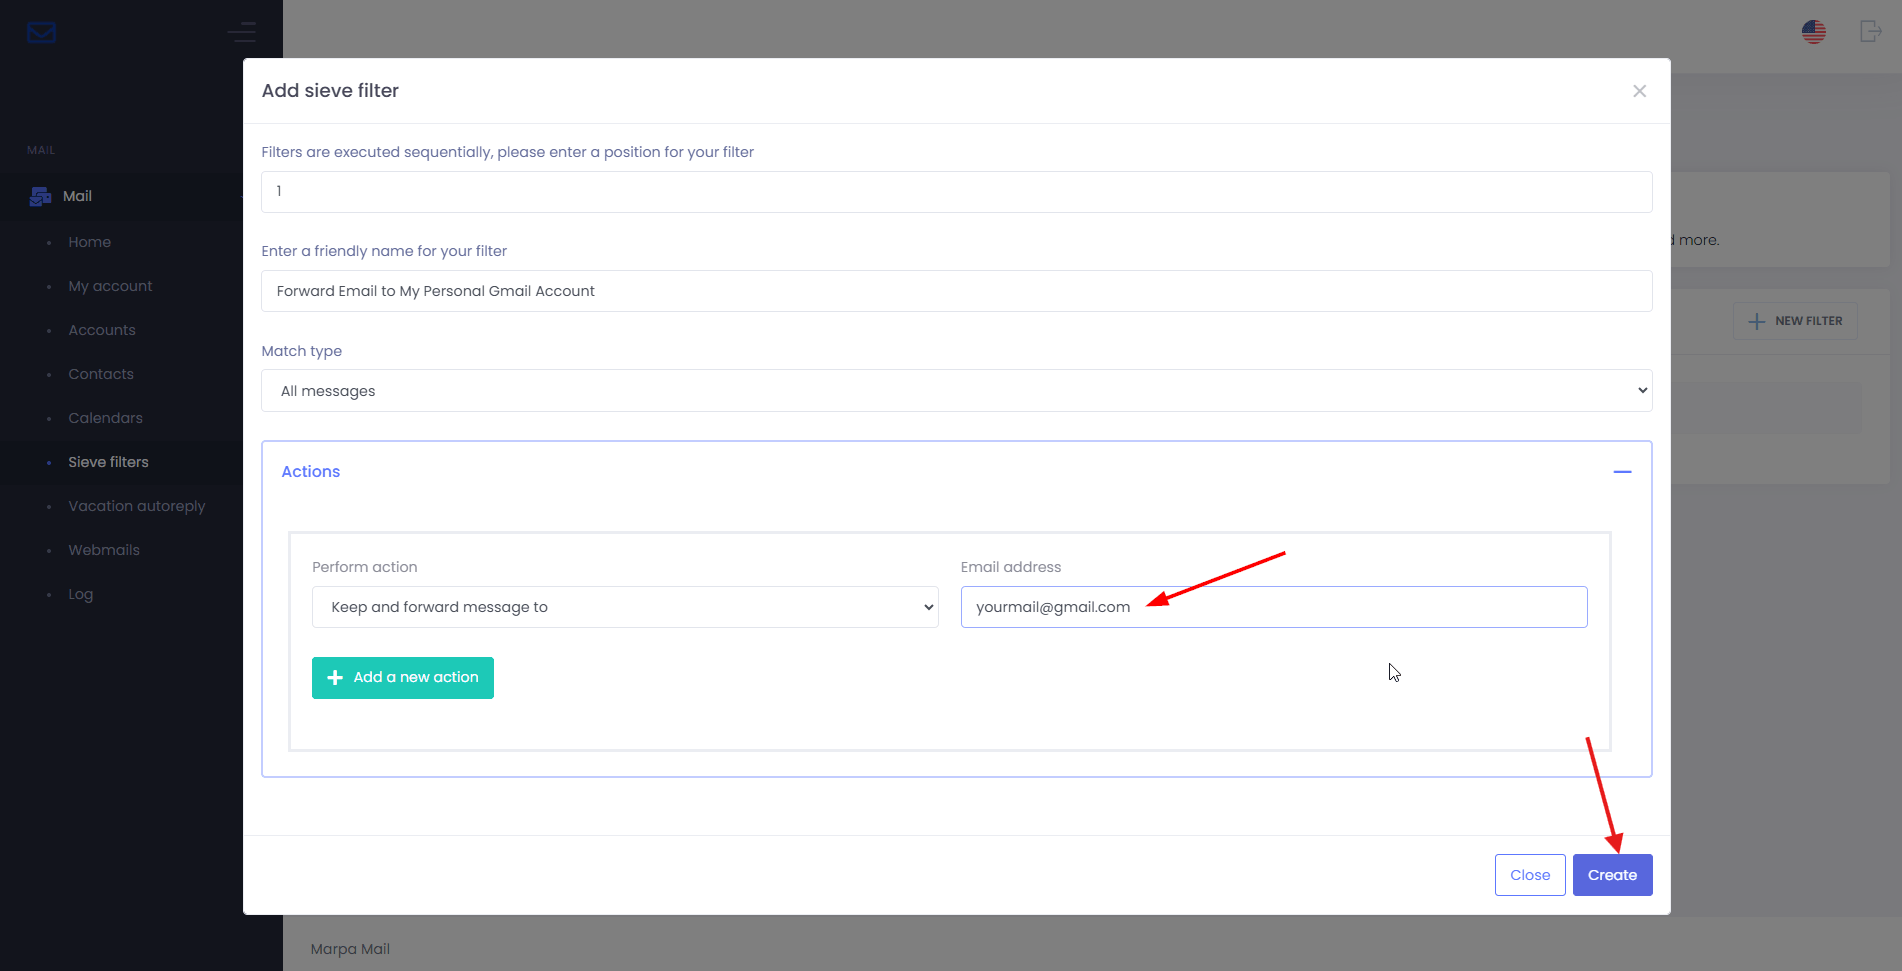
In the Perform action dropdown, select Keep and forward message to.
This option is useful when you want the original message to remain available in your MarpaMail mailbox while a copy is also forwarded to another email address.
Do not select Forward message to if you want to keep the original message in your MarpaMail inbox. Select Keep and forward message to for this forwarding setup.

Enter the Forwarding Email Address
Enter the email address where you want to receive the forwarded messages in the Email address field.
Make sure the destination email address is entered correctly, as messages matching the filter will be forwarded automatically to this address.
Review the filter settings and select Create.
MarpaMail will create the Sieve filter using the position, filter name, match type, and forwarding action you configured.
Confirm the Filter Was Created
After selecting Create, a confirmation message will appear indicating that the filter has been created successfully.
Select OK to close the confirmation message and return to the Sieve filters page.
The newly created filter will appear in the Sieve filters list.
Check that the filter is shown with the correct name and that its Status is enabled.
It can take a minute or two for the Forward rule to be created.
An enabled filter will automatically process incoming messages according to the forwarding rule you created.

Test Email Forwarding
Send a test email to your MarpaMail address and check the destination email account.
Because the filter is configured with All messages and Keep and forward message to, the incoming message should remain in your MarpaMail account while a copy is forwarded to the destination address.